Updated: June 15, 2022
1. Identifying Your Computer:
Determine if your computer has a 32-bit or 64-bit processor. Finding this information will depend on your operating system, so go to the relevant section below:
macOS:
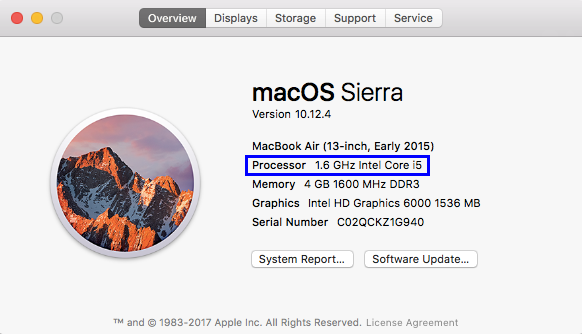
Click the Apple symbol at the top left of your display. Select “About This Mac” from the drop-down menu. Take note of the processor information as highlighted above. Running a web search for this processor will take you to the manufacturers website, which should list the processor’s stats as well as whether it is 32-bit or 64-bit.
Windows:
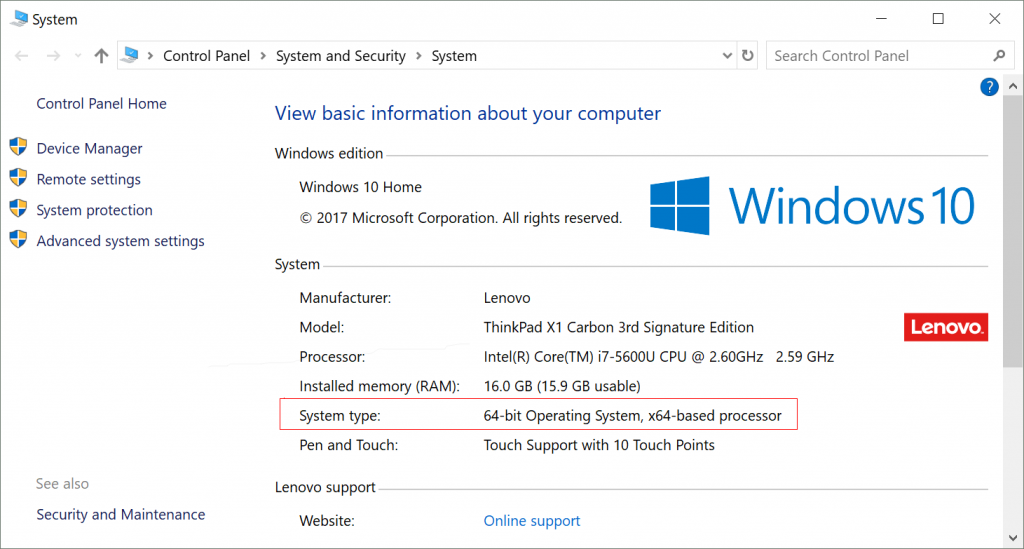
Navigate to “Control Panel → System and Security → System” and look for the highlighted information to determine whether your system is 32-bit or 64-bit.
2. Installing VirtualBox
Visit the VirtualBox downloads website, and in the highlighted area, select the platform package binary that applies to your operating system. VirtualBox is available on Windows, macOS, Linux, and Solaris. The latest release will be listed here so the VirtualBox release number may differ.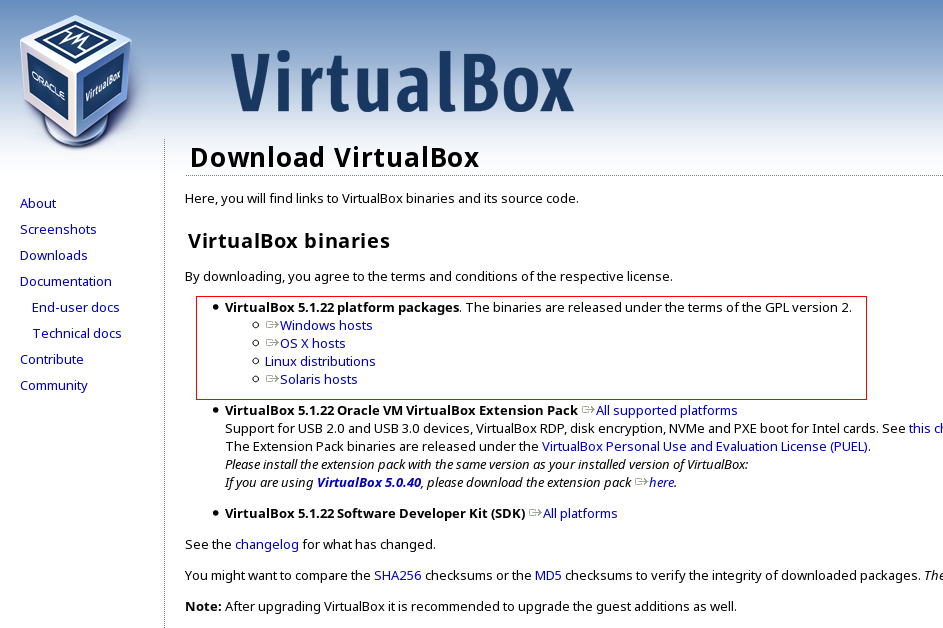
Opening the downloaded file will start the installation walkthrough. Once it finishes, you’ll be able to launch the application.
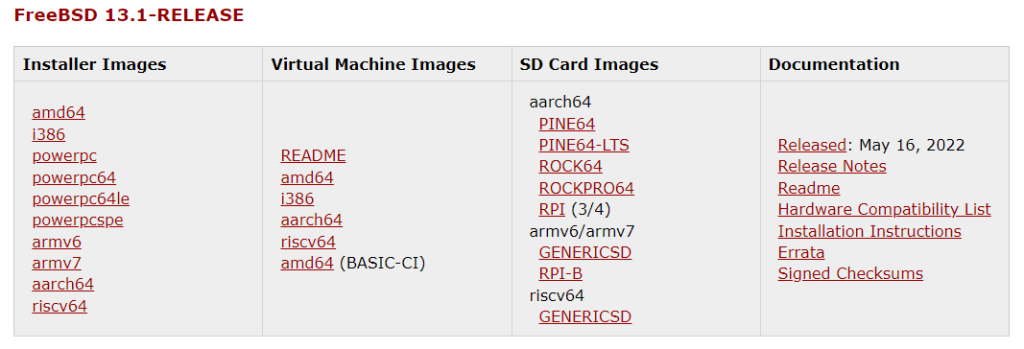
3. Getting the latest FreeBSD release:
Downloading FreeBSD
Visit the official FreeBSD releases page. The disk images are listed in order of release date, so the most recent release can be found at the top of the page as highlighted.
- For 32-bit machines, click on i386
- For 64-bit machines, click on amd64
After clicking the link, you will be redirected to a file directory containing multiple formats and versions of the FreeBSD installer.
NOTE: Although there is a section on the release page for virtual machines, do not download those options for VirtualBox.VirtualBox cannot read .qcow files like other virtual machines and requires a .iso installer format.
Identifying the Correct Disk Image
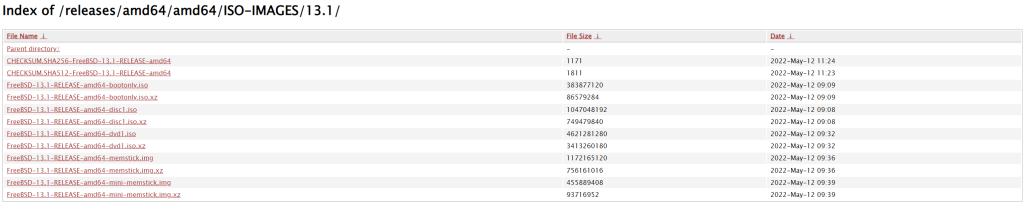
For Virtual Machines, the format you are looking for is the file ending in -disk.iso as highlighted above. Click this file and it will start downloading the installer.
4. Configuring and Starting FreeBSD on VirtualBox:
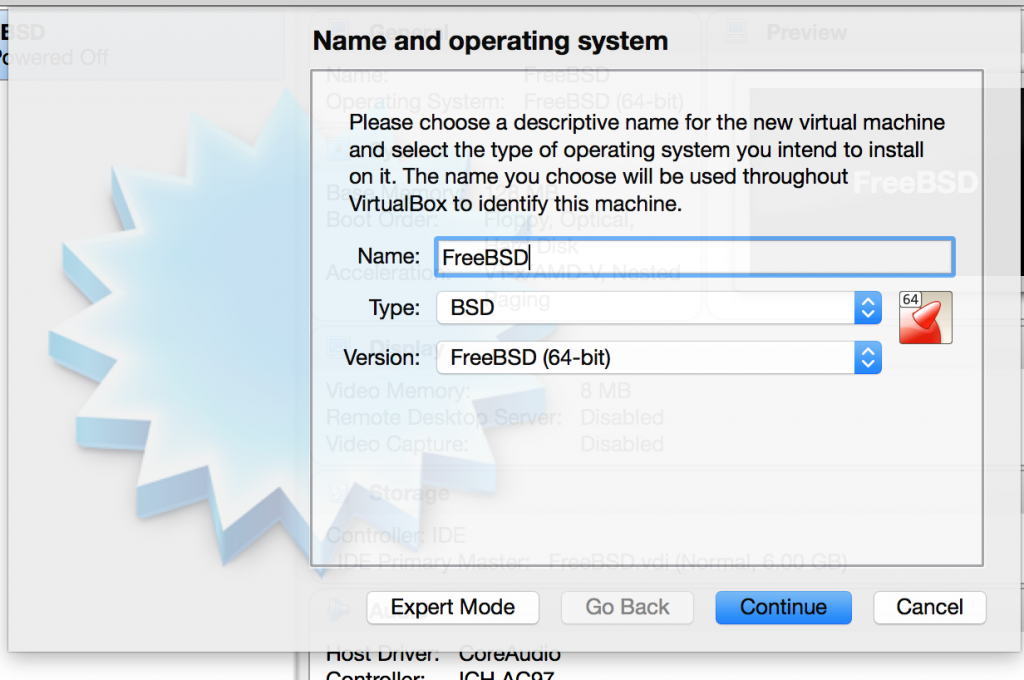
Once the FreeBSD installer has been downloaded in the last step, open VirtualBox to start hard disk configuration. Select the “New” button on the top left of the window to open the configuration window.
Name your operating system as “FreeBSD”, then select FreeBSD from the dropdown menu as well as the version (32 or 64 bit).
The program will then guide you through hard disk setup. The default settings work perfectly for FreeBSD. However, if you plan on installing a large number of applications or a desktop environment through FreeBSD, allocating 15GB+ of disk space is recommended. This can be adjusted later and the default settings should be plenty of room for the average user.
After the hard disk has been configured, boot up the operating system with the “Start” button. VirtualBox will start up a virtual machine and ask for a virtual optical disk file. This will be the .iso file that you downloaded through the FreeBSD website. Navigate to this file by clicking the small file symbol next to the drop-down menu. Once selected, the booting process will continue and the FreeBSD installer will start.
5. Booting into FreeBSD:
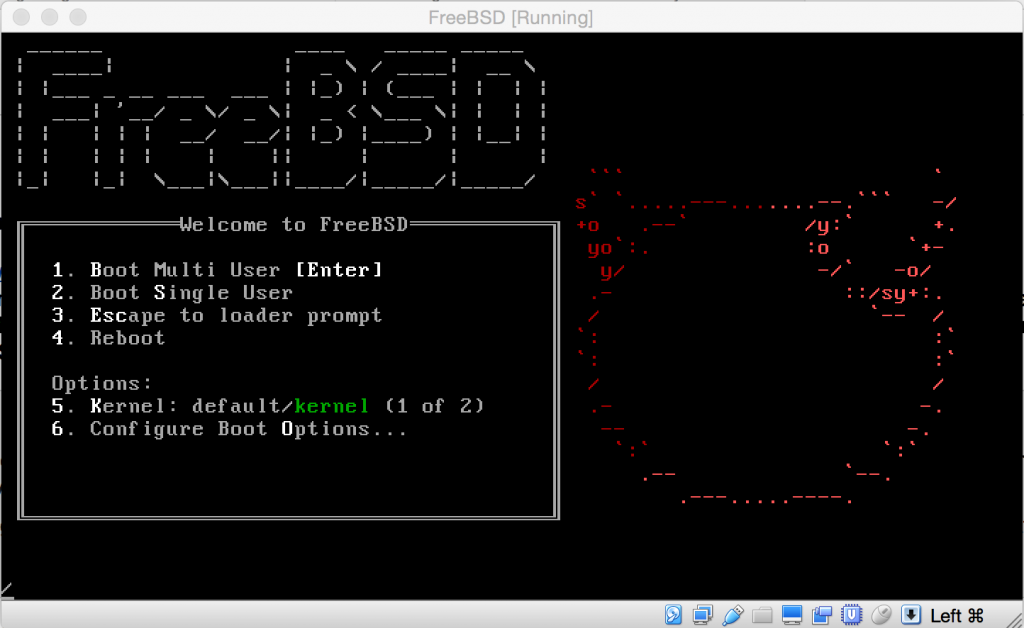
The FreeBSD booting system will automatically start once VirtualBox starts the virtual machine. Follow the FreeBSD handbook’s installation guide to configure and setup your system. When in doubt, use the default options provided, as they can be reconfigured later if necessary.
Once installation incomplete, continue using FreeBSD handbook’s post-installation guide. Once again, using default options when recommended.
While creating the initial account, it is recommended to add the user to the wheel group, this will give the user access to administrative commands.
NOTE: when you type in passwords in FreeBSD, the text will not appear on the screen, but will still be entered.
6. Saving Your Configuration:
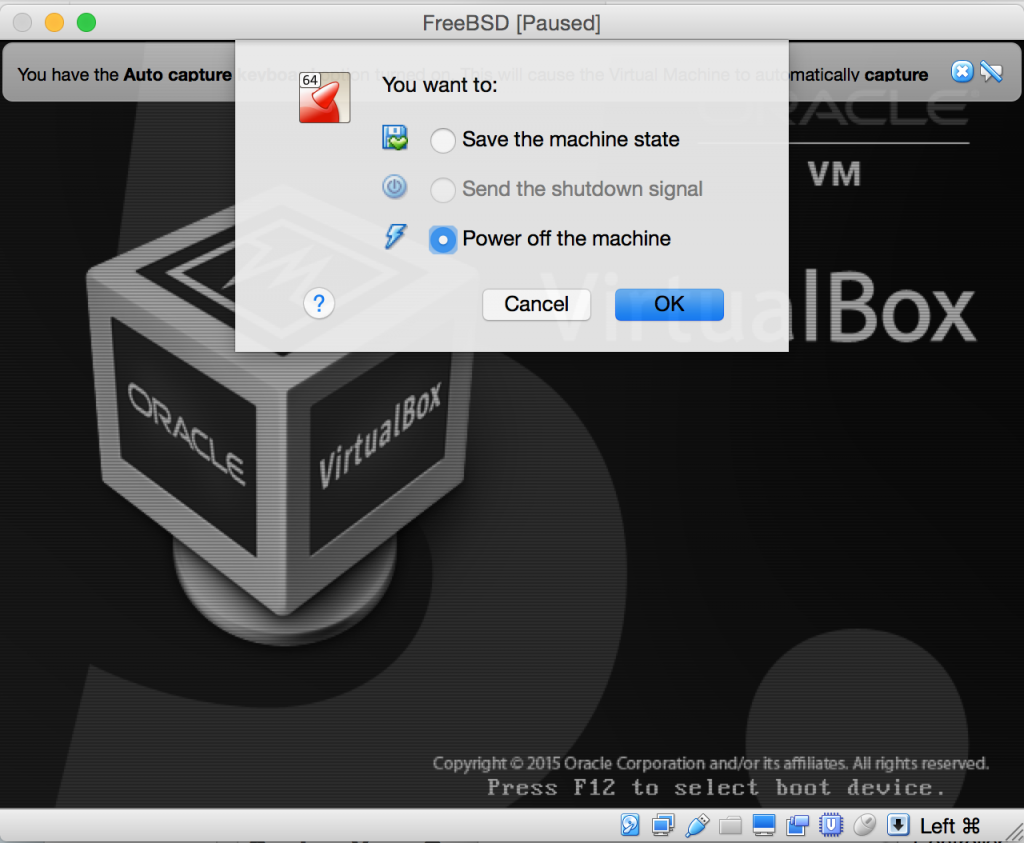
Once FreeBSD has been properly configured a window will appear asking if you would like to reboot to set the changes. Select “yes” and wait until the FreeBSD booting page appears again. Once this happens, close the virtual machine window and select “Power off the machine”.
7. Removing the Installation Disk:
On the main VirtualBox application, click the the section (on the lower right side of the window) that says “Storage”. A new window should appear showing the storage options.
Under the main “Controller: IDE” there will be two options. One will be the hard disk that VirtualBox created for the system (it will have a square blue hard drive icon) and the other is the original FreeBSD download (with a light blue disk icon). Right click the sub-storage with the disk icon and select “Remove” from the drop-down menu.
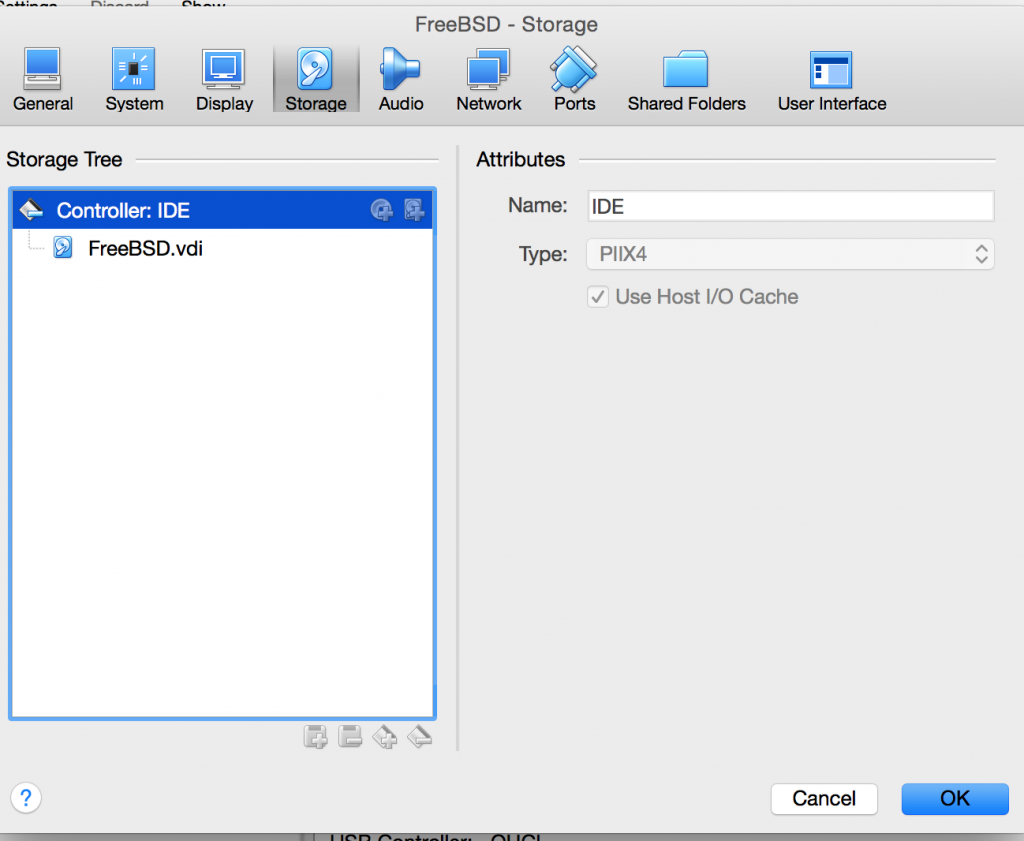
Once it is removed, the window should resemble the one pictured above.
8. Final Configurations:
Select “OK” to save your changes and return to the main VirtualBox application. Click “Start” again and the FreeBSD virtual machine should now boot in its configured form. You now have FreeBSD installed on your machine!
VirtualBox comes with virtual graphics/audio drivers that FreeBSD may have trouble identifying. To fix problems that may arise later on as a result, log in and enter these lines at the prompt (ignoring the “$”):
Install the VirtualBox guest addition packages:
$ pkg install emulators/virtualbox-ose-additions
Open the startup service configuration file located at /etc/rc.conf using the built-in text editor ee
$ ee /etc/rc.conf
(To edit the file using ee, navigate using the arrow keys and type the text you need to enter. Once you are happy with your changes, press “<Esc> + <Enter>” and press “a” when given the option to save changes.)
Add these two lines to the bottom of the file and save your changes:
vboxguest_enable="YES"
vboxservice_enable="YES"
You are now ready to start using your FreeBSD system and install a desktop environment!
9. Installing the X Window System:

Before installing a desktop environment, a graphical user interface (GUI) is needed. The X Window System is an open source GUI that supports FreeBSD and offers a ton of customization and user tools.
Xorg (the X Windows System) can be installed as a package, this require root privileges so users should first run:
# su
Then after entering the root password, to install the binary package:
# pkg install xorg
Installation will then start, duration can vary between a few minutes (installing from packages on a fast computer) to hours (if compiling from the ports collection).
10. Learning How to Edit Text Files:
To continue working with FreeBSD and configuring system tools, a general understanding of text editing will be needed. The most powerful tool FreeBSD includes for this process is the “vi” command.
Read through the manual page. While this page may be overwhelming at first, don’t worry! Just focus on the commands that let you enter and delete text, “a” and “x”. A handy cheat sheet for vi commands can also be found above.
Before entering a command the “esc” key must be used. If you have already used the “a” command to enter text, the “x” key will simply enter that character unless you first esc the command.
Once you are finished use “esc” to end the last command. Then use one of the save/quit commands to quit editing the file. If you want to save changes use “:wq” otherwise use “:q!” to quit without saving changes.
Now that you have a basic understanding of the “vi” command, the next step is to edit FreeBSD configuration to help setup a desktop environment.
11. Configuring the X Window System:
The X Window System uses 3D acceleration. In order to benefit from this, users who will be using the GUI need to be added to the video or wheel groups. This can be done in one command as root. This may have already have been done while setting up the user, but it can be easily done later. Enter these lines but replace slurms with the user you are adding:
# su
# pw groupmod video -m slurms || pw groupmod wheel -m slurms
This will add the user to the video group, or if that doesn’t exist, the wheel group.
Next, FreeBSD must be configured to set the video output mode. Use the “vi” command to start editing /boot/loader.conf
# vi /boot/loader.conf
Add this line to the top of the file:
# kern.vty=vt
12. Installing and Configuring Lumina:
Install Lumina from the binary package:
# pkg install lumina
Next, you will need to mount /proc. Add the following line to /etc/fstab using the “vi” command, this will mount /proc on startup:
# proc /proc procfs rw 0 0
If you want Lumina to launch
You will next need to configure Lumina. This can be done by adding these 4 lines to /etc/rc.conf using the “vi” command. This ensures that Lumina and all its dependencies are running on boot:
dbus_enable="YES"
hald_enable="YES"
moused_enable="YES"
mixer_enable="YES"
To ensure DBUS service, run:
dbus-uuidgen --ensure
And finally, to launch Lumina, run:
start-lumina-desktop
You Did It!
You now have a desktop environment on your device! the start-lumina-desktop command will launch the desktop environment from the FreeBSD shell. Each environment has its own settings but offer a console app to use for command line use. Quitting the environment will also allow the user to access the FreeBSD shell.
The next step is using your new desktop environment to download a collection of graphical and accessibility applications or utilities to suit the user’s needs. Check out the FreeBSD ports collection to find a list of available applications.